Creating API Keys for Google Play Console
Generate and configure Google Play Console API keys to enable Statused monitoring for your Android apps.
This guide walks you through creating API keys for Google Play Console to enable Android app monitoring. Google's official documentation can be confusing, so we'll break it down step by step with clear instructions.
Before You Start
What You'll Need:
- Admin access to your Google Play Console account
- Google Cloud permissions to either create a new project (Project Creator role) or manage service accounts in an existing one (Service Account Creator role)
Language Tip
If you see Google Play Console in your local language, add &hl=en at the end of any URL (before #...) to switch to English. All links in this guide already include this parameter.
Creating Your API Key
Note Your Developer Account ID
Head to Google Play Console, click Account Details, and write down your Developer Account ID. You'll need this to verify you're working with the correct project later.
Enable the Google Play Developer API
Before creating API keys, you need to enable the Google Play Developer API:
-
Go to Google Play Developer API in Google Cloud Console.
-
Choose an existing Google Cloud project or create a new one.
Pro Tip
Create a dedicated project called "Google Play Console Project" for all your Google Play API needs. This keeps things organized and makes permission management easier.
- Click ENABLE to activate the Google Play Developer API for your selected project.
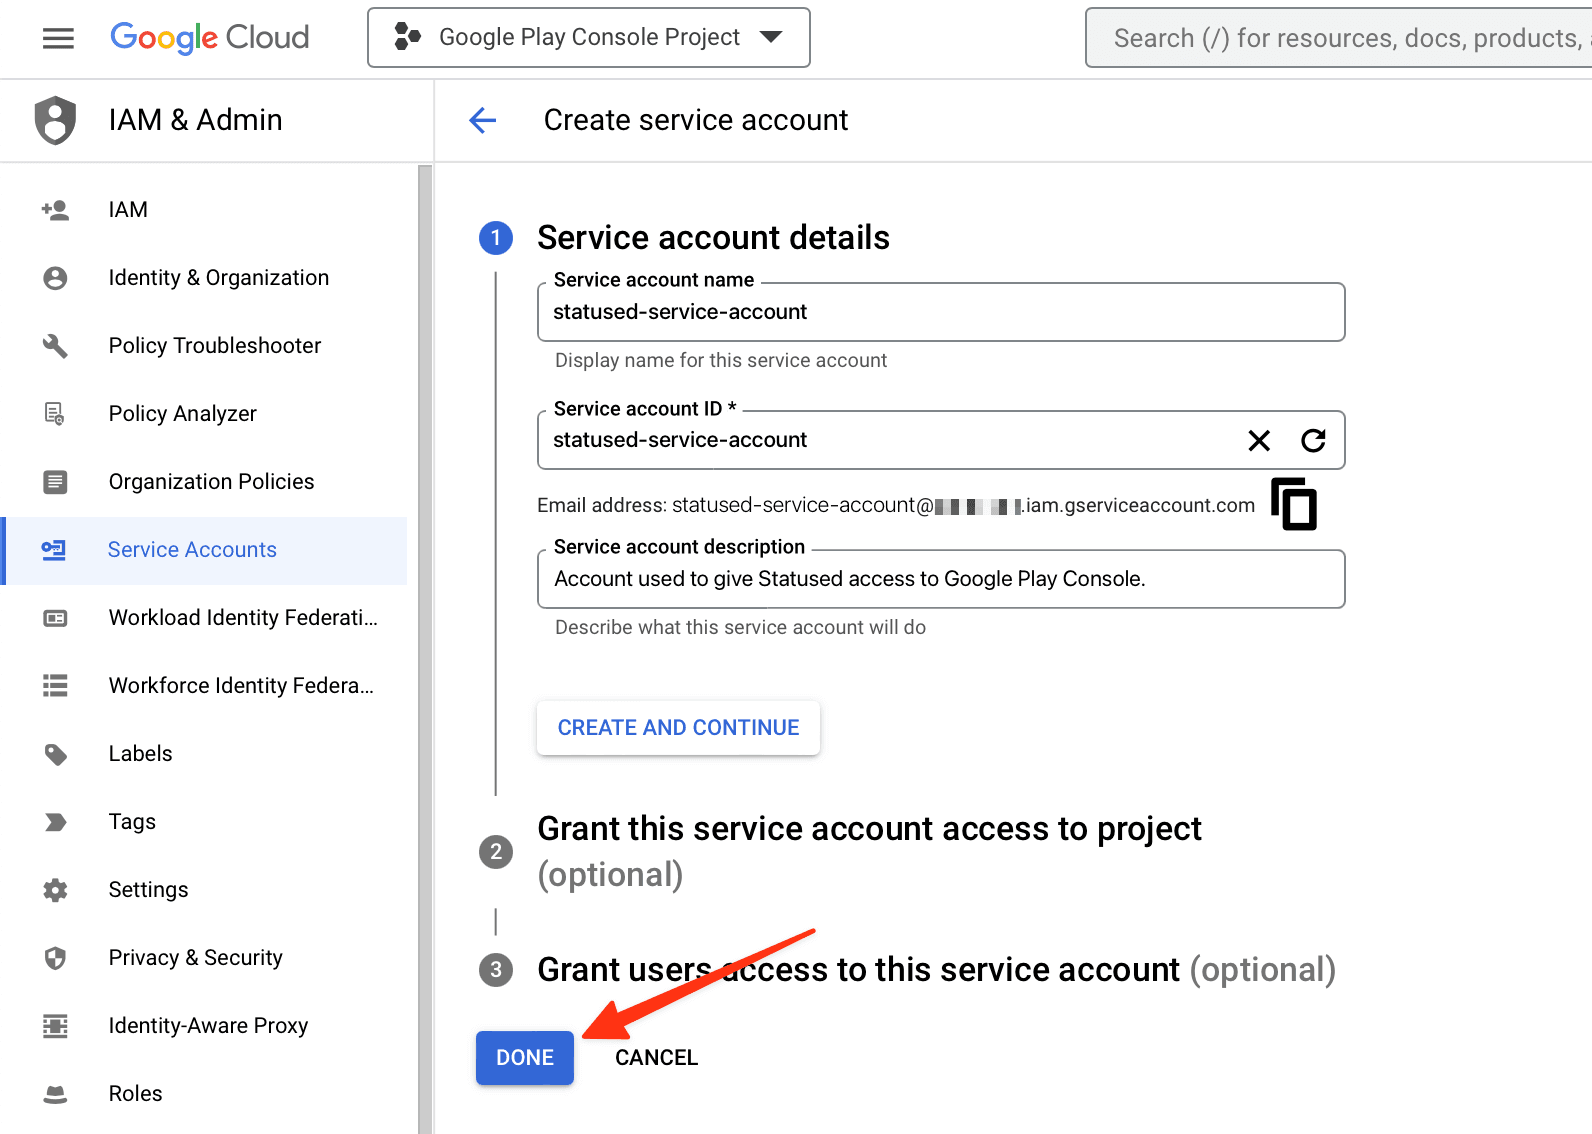
Create a Service Account
Best Practices
If you're already using a service account for tools like fastlane, don't reuse it. Create a dedicated one for Statused to prevent API rate limit conflicts and keep your integrations isolated.
-
Open Service Accounts and select the project you want to use.
-
Click CREATE SERVICE ACCOUNT at the top of the page.
-
Check that you're in the correct project by looking for your Developer Account ID in the light gray text before
.iam.gserviceaccount.com, or check the project name in the navigation bar. -
Provide a descriptive name like "statused-service-account".
-
Save the generated email address below the Service account ID field. You'll need this later.
-
Click DONE (don't click CREATE AND CONTINUE as the optional steps aren't needed).
Create Your API Key JSON
After creating your service account, you'll see it in the service accounts list:
-
Click the button next to your new service account and select Manage keys
-
Click in ADD KEY › Create New Key
-
Ensure JSON is selected as the key type and click CREATE
-
Download and save the JSON file to your computer. Remember the location as you'll need to upload this to Statused.
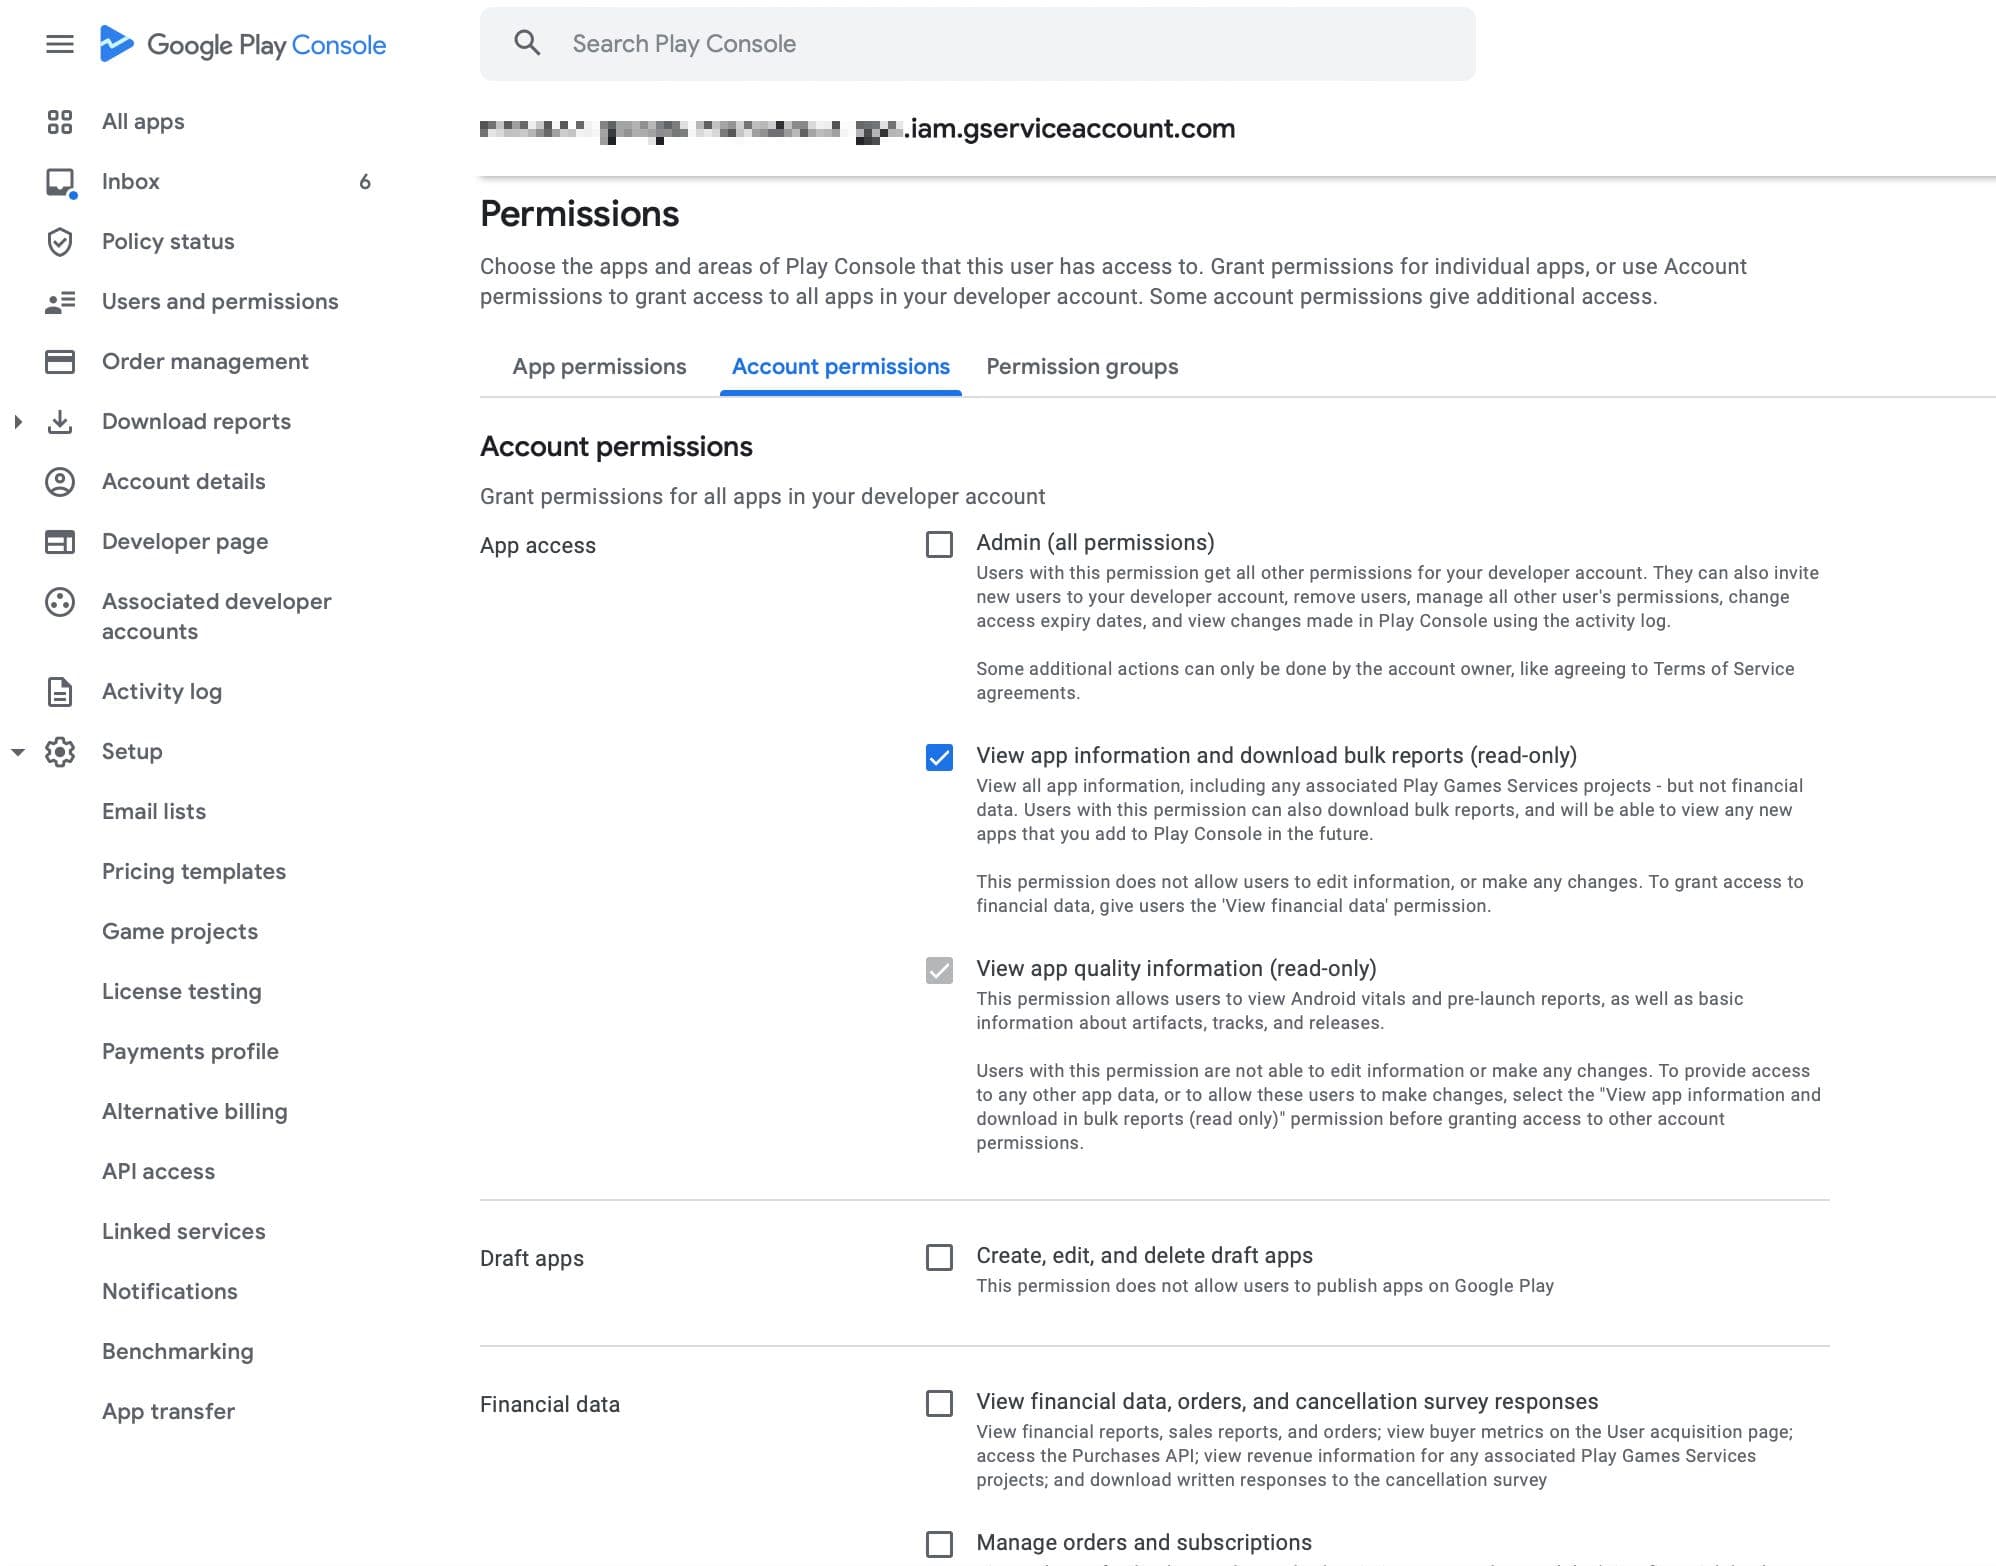
Grant Console Access
Next, you'll need to connect the service account you just created to Google Play Console.
-
Go to Google Play Console and select Users and permissions › Invite new users
-
Paste the service account email you saved earlier — the one that ends with
.iam.gserviceaccount.com. -
Make sure to not add any apps to the App permissions tab.
-
Instead, open the Account permissions tab and choose appropriate permissions:
- Select only View app information and download bulk reports (read-only)
- This provides read-only access, which is all Statused needs and keeps your account secure
Here for fastlane?
If you're here to set up fastlane instead of Statused, select Admin (all permissions) to ensure full access. This avoids common permission issues when running fastlane actions like
supplyorvalidate_play_store_json_key.
- Finally, click Invite user and confirm to send the invitation. This completes the setup.
Next Step: Connect to Statused
With your JSON key file ready, you can now connect your Google Play Console account to Statused:
- Head back to your Statused dashboard and navigate to API Keys › Add API Key
- Select Google Play as your platform
- Upload your service account
.jsonfile and fill in the other required details - Hit Add API Key — we'll automatically validate the key permissions when saving to ensure everything was set up correctly.
That's it! Your Google Play Console account is now connected.
Where to go from here
Now that your Google Play Console account is connected, head back to the Quickstart guide to set up your first monitoring workflow.
Troubleshooting
Having issues? This process can be tricky. If you run into problems, reach out and we'll help you get set up properly.
Here are some common resources from Google that might help: